MySQL with workbench using Docker
![]()
Sometimes in your efforts to learn new technologies, you have the necessity to test new tools and learn new abilities, like the use of databases and SQL.
Starting well
With this post, I would like to give anyone a way to quickly start developing and using MySQL and Workbench in their studies.
Tools
- MySQL:

MySQL is the world’s most popular open source database. With its proven performance, reliability and ease-of-use, MySQL has become the leading database choice for web-based applications, covering the entire range from personal projects and websites, via e-commerce and information services, all the way to high profile web properties including Facebook, Twitter, YouTube, Yahoo! and many more.
Source: MySQL Official Page - MySQL Workbench:

MySQL Workbench is a unified visual tool for database architects, developers, and DBAs. MySQL Workbench provides data modeling, SQL development, and comprehensive administration tools for server configuration, user administration, backup, and much more. MySQL Workbench is available on Windows, Linux and Mac OS X.
Source: MySQL Workbench Official Page - Docker:

Docker is an open platform for developing, shipping, and running applications. Docker enables you to separate your applications from your infrastructure so you can deliver software quickly. With Docker, you can manage your infrastructure in the same ways you manage your applications. By taking advantage of Docker’s methodologies for shipping, testing, and deploying code quickly, you can significantly reduce the delay between writing code and running it in production.
Source: Docker Official Page
Identifying the problem
I need a database and a tool for data modeling and querying using SQL!
To fast start your studies or analysis on any of these tools you should be able to have it in minutes and not hours or even worse manipulating huge VM images.
Step-by-step
- Install docker and check if it working.
- Open the terminal
- Pull the docker image for MySQL
docker pull mysql
- Now we will create the container who will have MySQL running
-
docker run -p 3306:3306 -p 33060:33060 -v /home/leogaller/Documents/cursos/pece-poli/disciplina/"Arquitetura de BI e Big Data":/home/data --name mysql-poli-1 -e MYSQL_ROOT_PASSWORD=123456 -d mysql:latest Let’s see what each part of the command is doing:
docker run: Docker runs processes in isolated containers. A container is a process which runs on a host. Reference
-p 3306:3306 -p 33060:33060: We are telling to the container that we want the host port 3306 to be mapped to the container port 3306. With this will be able to access it from the host.
-v /home/leogaller/Documents/cursos/pece-poli/disciplina/"Arquitetura de BI e Big Data":/home/data: In this one, I’m telling to the container that I want to share a volume(directory) with the container, in which it will be created as/home/dataRemember to replace to the folder in your computer that you want to share with the container.
--name mysql-poli-1: This is the name that I want the container to have.
-e MYSQL_ROOT_PASSWORD=123456: This parameter is extremely important because with this one you will be able to access MySQL from workbench.
-d: Run this container in detached mode. Detached mode.
mysql:latest: Telling which image version to use. - Verifiy that the container is running
docker ps
-
- Now that we saw that the container is running correctly we need to get it IP to use in workbench
- Let’s check for the network that docker created to find this container.
docker network list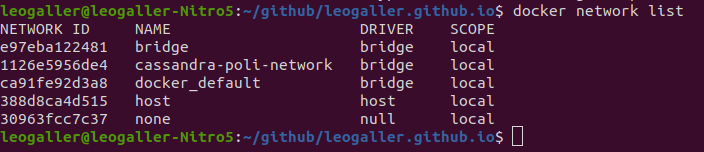
- You can the IP of the container inspecting the network bridge, you will its IP in the parameter IPv4Address
docker network inspect bridge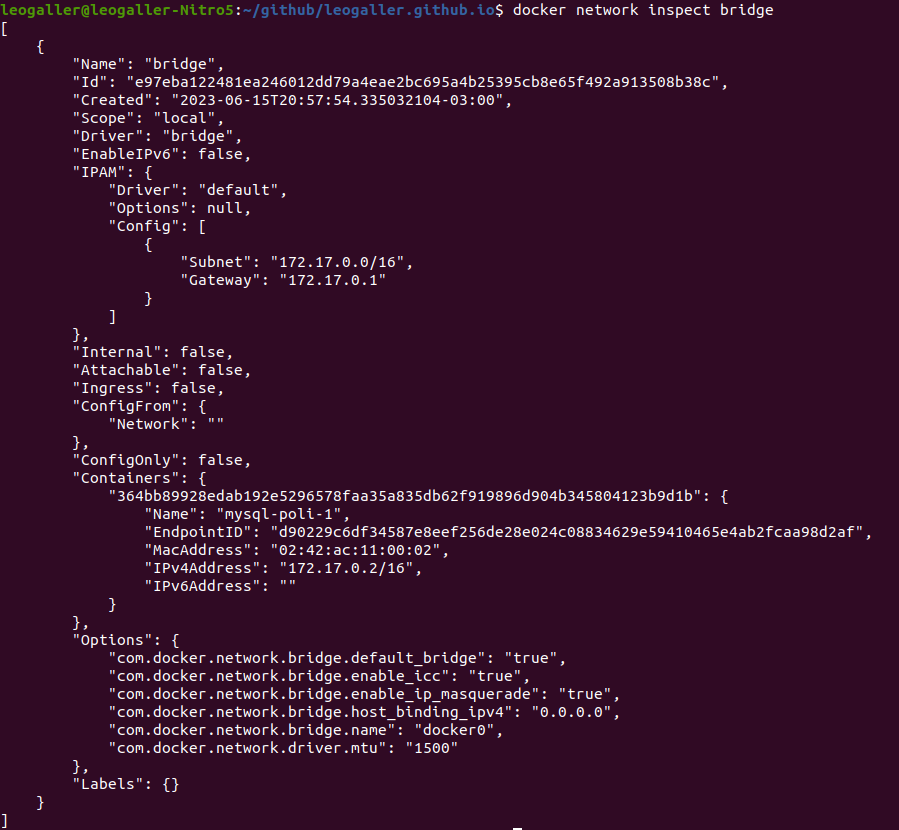 Focusing in the important part
 The IP we have is 172.17.0.2, save it for later.
- Let’s check for the network that docker created to find this container.
-
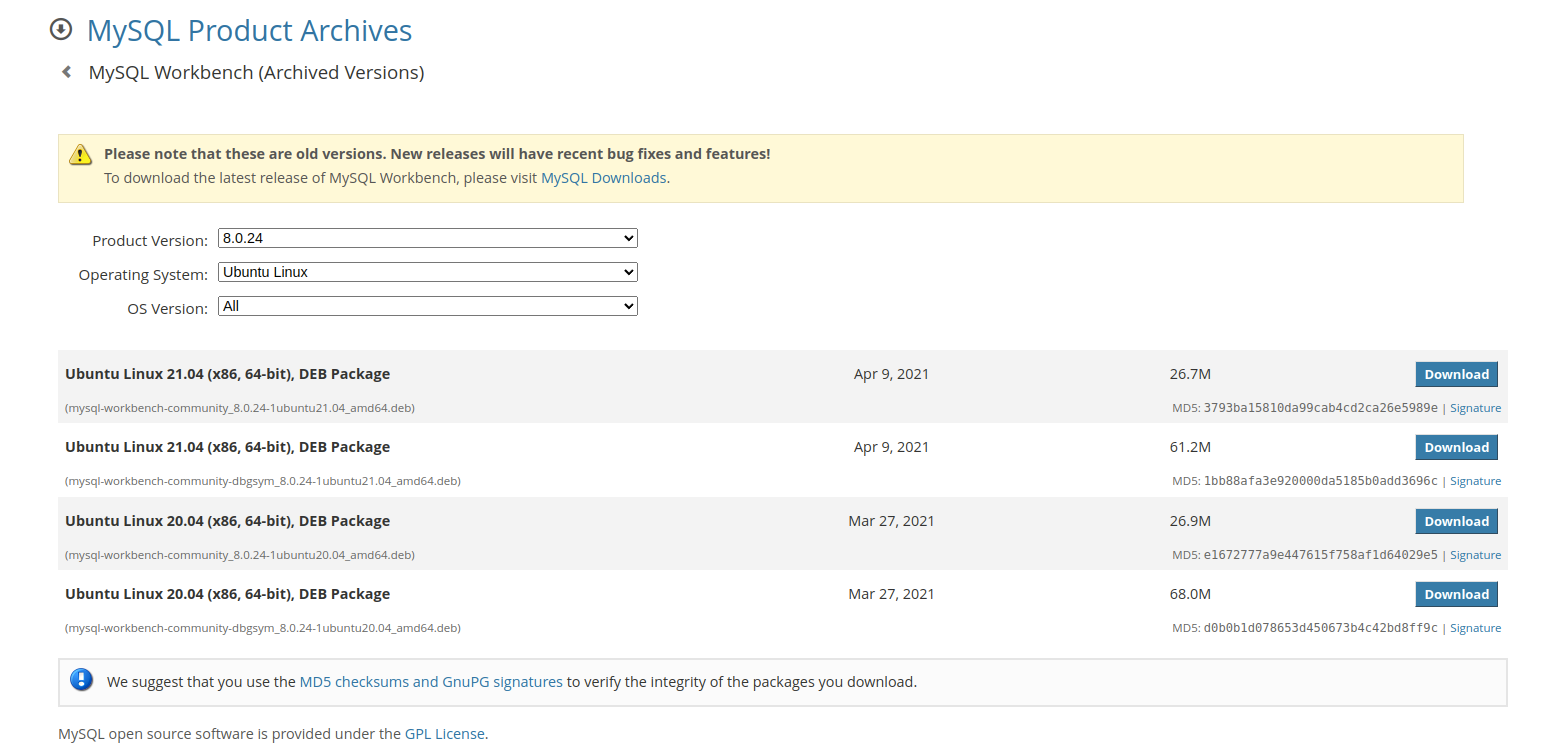
Install Workbench from here. Correctly select your operational system. In my case it is an Ubuntu Linux.
- After the installation is complete lets connect to the container
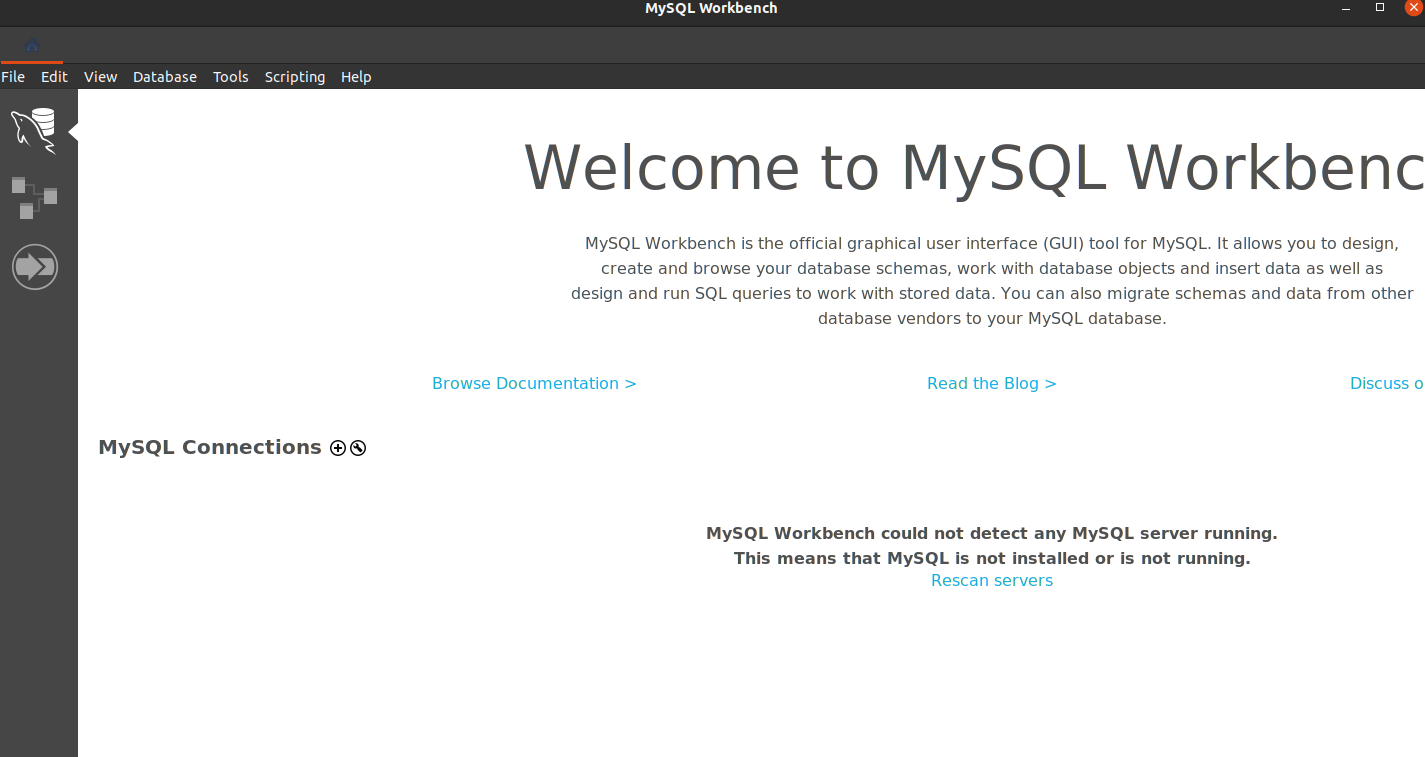
- Initial workbench screen
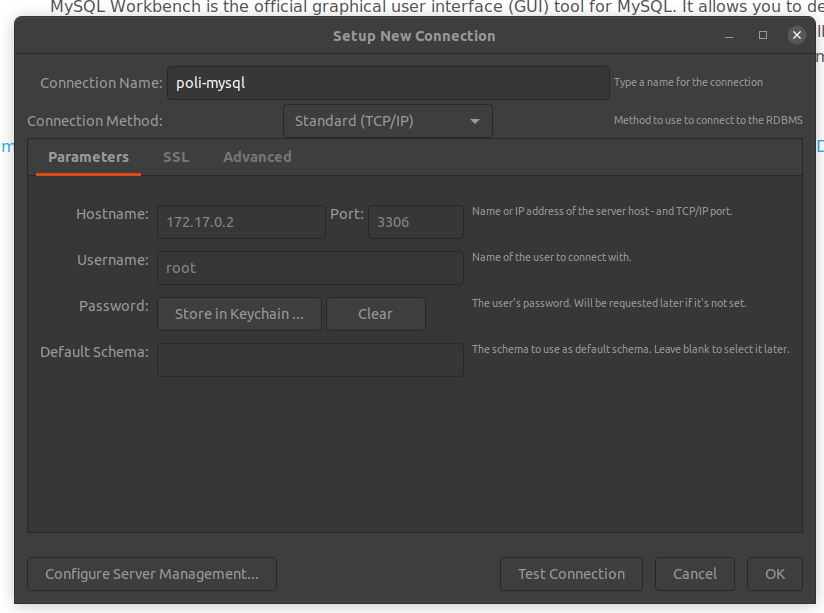
- Set a new connection, see that I gave a useful nume and in the hostname I placed the IP that I get from the network inspect. The password you created you will need to save it to a keychain for security.
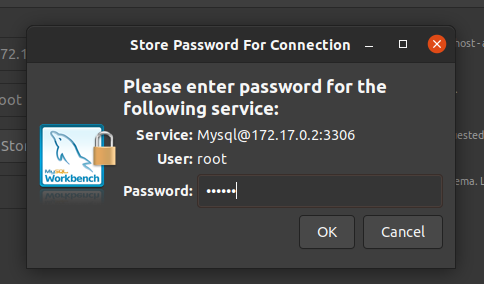
- Save the password to the key chain(it is the same password that you set in the parameter MYSQL_ROOT_PASSWORD)
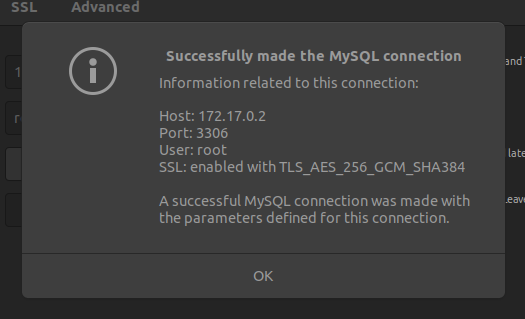
- Test the connection(If you did everything correctly it will be a successful connection.:D )
- Click OK
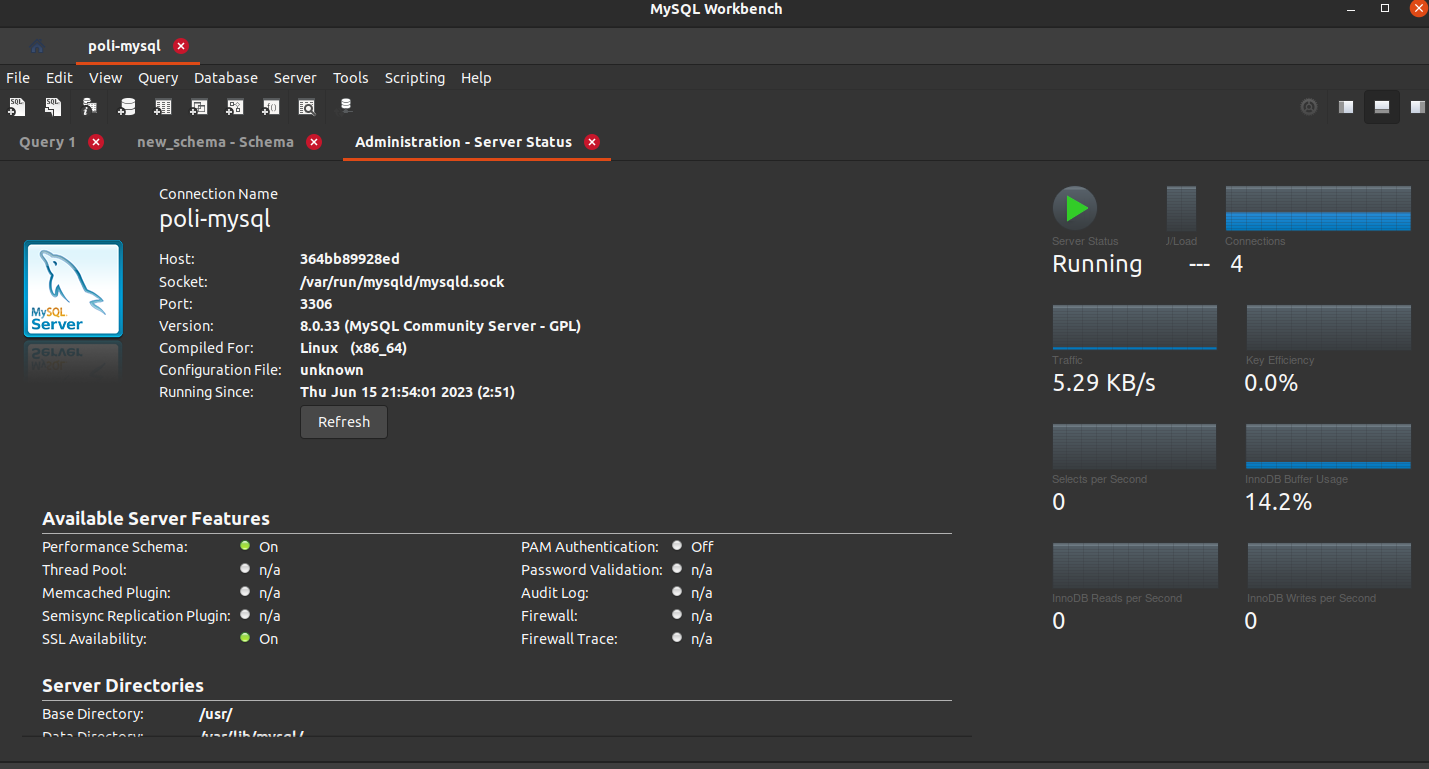
- Initial workbench screen
-
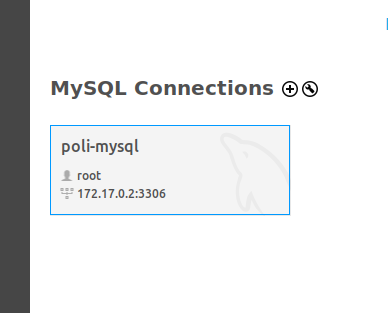
Now you will be able to see the newly created connection.
-
Access the new connection clicking on the icon.
-
When you are not using, stop the container(remember to get the container ID using docker ps).
docker container stop <CONTAINER-ID>
- When you wish to go back where you stopped, remember to restart your container. You do not need to run
docker runnow you will usedocker container start.
- See your stopped container
docker ps -a - Restart the container
docker container start <CONTAINER ID / OR NAME>docker container start mysql-poli-1
- See your stopped container
Conclusion
Instead of downloading a huge software like VirtualBox or VMWare Player, and then a 8g image, just use docker. It will be faster and lightweight. I hope you enjoy this small tool!
Be safe!